How To Restore Backup In Windows 8
Here is a quick step-by-step tutorial on how to restore backup in Windows 8. Restoring files in any operating system is very much important as it saves all your data from being lost in case of any mishap. The available option in the navigation bar, “Restore Personal Files” allows you to select files that you want to restore to the original locations.
Now, without wasting time on talking about other unnecessary stuff, lets quickly check out the steps.
How To Restore Backup In Windows 8:
- First of all, you have to turn on the file history to restore backup,
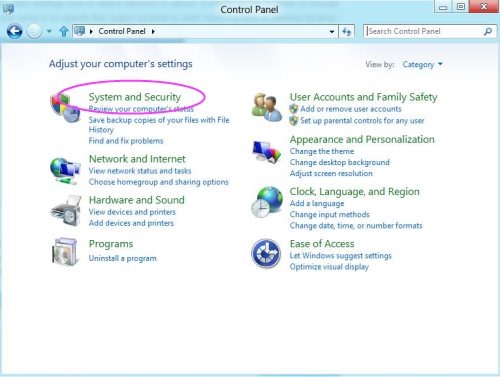
- To restore backup in Windows 8, open the control panel.
- Click on “System and Security” and then select “File History”.
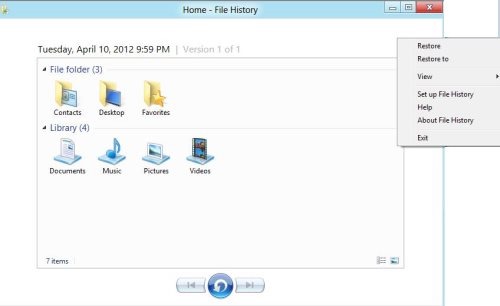
- Now click on restore personal files and select the folders and libraries which you want to back up.

- Once you are don’t with selection of folders and libraries, Click on restore button (Placed between the navigation bar).
- It’s recommended to verify the file version before you restore.
- The settings icon allows you to restore any backed up folder to remote or local location.
- Click on settings and then “Restore To” option.
- Now, all you need to do is specify any defined location to restore the selected files.
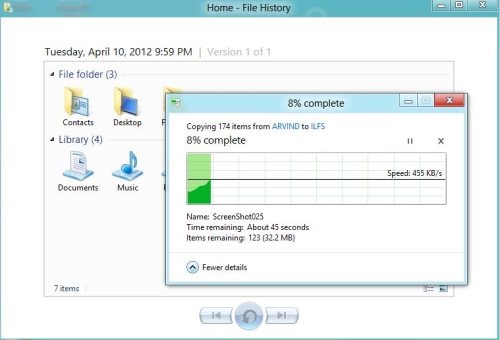
- Select the contents you want to restore, All the backup files would be restored to your PC.
Note: After running the file operation, check out the destination path to verify whether all the libraries and folders are backed up.
Also, check out our post on Important Windows 8 Tutorials.
Go ahead and start get all the files backed up in Windows 8.